Sunday, December 29, 2019

FACETED HYPERTUFA CACHEPOT

Faceted Hypertufa Container

Here’s a nice, simple project for the winter months.  It will make a make a great little cachepot for fresh flowers and a perfect pot for small herbs in spring. 

What You Need

1 ¼”pink (Home Depot) or blue (Lowes) insulation foam 
    White Styrofoam blocks from shipping cartons can work but will take a bit more preparation.
X-acto knife
Small keyhole saw
3” common nails
baking spray
Plastic mixing bowl
Mud gloves
Mason’s trowel
plastic covered work surface

Freshly mixed hypertufa.  Here’s a simple recipe;

What You Do

1.  Measure four 5” x 6” rectangles from the sheet of insulation foam for the sides of your mold and one 7 1/2’ square for the base of the mold.

2.  Measure in 1 ¼” from the left side and draw a line of each of the four side pieces of the mold. Draw a rectangle on the right side of each piece.  Draw an “X” from corner to corner of the rectangle and then a cross from center to center.  Cut each section of this rectangle using the X-acto knife.  The blade tip should always be pointing inward and held at a 45 degree angle. Cutting in this way on each side of each shape, a faceted piece of foam will pop out for each one.  When you are finished, you will have a beautifully faceted surface. 
3. Assemble the four sides of the mold using 2 or 3 common nails in an overlapping fashion so the resulting mold has four equal sides. 
 4. Attached the base of the mold to the sides using common nails. Spray the inside of the mold with baking spray.

5.  Mix your hypertufa to a clay-like consistency and pack the mold starting at a corner in the base and building brick-layer style around the mold until you reach the top. Sides should be between ½’ to ¾” thick. Poke a hold in the bottom with your finger for drainage if desired. Use your hand to smooth and round the edge of the cachepot along the top. Allow to set and cure for three to four days.  
6. When the hypertufa is hard to the touch, remove the bottom of the mold first and then each of the sides.  If you are careful, you will be able to use this mold repeatedly.
7. Cleanup rough edges with the edge of the trowel and then rinse the cashepot with water to remove dust.  Allow to dry and then put it to use by slipping a glass filled with water into it for fresh flowers or potting it up with a living plant.


Saturday, November 2, 2019

THE 12 DAYS OF CHRISTMAS...HAUL OUT THE HAPPY


The 12 Days of Christmas…HAUL OUT THE HAPPY
10:00 am -8:00 pm Daily
Opening Day is Wednesday, November 13,
running 12 consecutive days through
Sunday, November 24. Come join us!
At From the Summer’s Garden you’ll find joy inside and out.  
Discover handmade artwork, as you stroll about!  
We’re open for twelve days straight days from ten a.m. to eight,  
Our shelves are stocked, our spirits high, we simply cannot wait! 

 We’ll help you HAUL OUT THE HAPPY!

From the Summer's Garden
8601 Barkley Street
Overland Park, KS 66212
913-579-5395


Info: fromthesummersgarden.com

Wednesday, October 23, 2019

Browned Butter Pumpkin Pie


So I have recently discovered baking with browned butter and it is really yummy. In their pie shop, Four and Twenty Blackbirds in Brooklyn, the bakers make this awesome pumpkin pie with browned butter which gives the pumpkin a subtle butterscotch note that makes for the perfect autumnal pie. 

Browned Butter Pumpkin Pie

Your favorite crust for a 9-inch single-crust, partially prebaked 
6 tablespoons unsalted butter 
1 cup light brown sugar 
2 tablespoons water ½ cup heavy cream 
½ teaspoon vanilla extract 
2 large eggs 
2 large egg yolks 
½ teaspoon kosher salt 
12/3 cups pumpkin puree 
½ teaspoon ground allspice 
½ teaspoon ground cinnamon 
1/4 teaspoon ground ginger 
Pinch ground cloves 
1 teaspoon molasses 
2 teaspoons fresh lemon juice 
1 cup evaporated milk 

In a heavy-bottomed skillet, melt the butter over medium-low heat. Continue to cook; the butter will foam and then begin to turn golden, then nut brown; whisk occasionally. When the butter is nut brown, immediately add the brown sugar, whisk, and then carefully add the water to loosen. 

Cook until the mixture smells caramelized and starts to darken. Note: This does not take very long! Remove from the heat and slowly add the heavy cream (the mixture will bubble rapidly) and whisk until smooth. Allow to cool for at least 10 minutes. Stir in the vanilla extract.
Meanwhile, position a rack in the center of the oven and preheat the oven to 350° F. Place the prebaked pie shell on a rimmed baking sheet. In a separate bowl, lightly whisk the eggs and yolks together with the salt. Set aside. 

In the bowl of a food processor fitted with the blade attachment, blend the pumpkin puree with the allspice, cinnamon, ginger, cloves, molasses, and lemon juice until smooth. With the machine running on low, stream the brown-butter butterscotch through the food processor's feed tube and process until combined. Stream in the egg mixture, followed by the evaporated milk; blend until smooth, stopping once or twice to scrape down the sides with a rubber scraper. 

Strain the filling through a fine-mesh sieve into a separate bowl, pressing through with a rubber scraper. Pour into the prebaked shell. Bake on the middle rack of the oven for 45 to 55 minutes, rotating 180 degrees when the edges start to set, 30 to 35 minutes through baking. 

The pie is finished when the edges are set and puffed slightly and the center is no longer liquid but still quite wobbly. Be careful not to overbake or the custard can separate; the filling will continue to cook and set after the pie is removed from the oven. Allow to cool completely on a wire rack, 2 to 3 hours. Serve slightly warm, at room temperature, or cool. 

The pie will keep refrigerated for 2 days or at room temperature for 1 day. 

Saturday, October 12, 2019

2019 AUTUMN TO WINTER WREATHS

As you view this slideshow of the 2019 Autumn into Winter Wreath Workshop, note the variety and richness in each of these unique wreaths. Wreath-making is a first love at From the Summer's Garden. You can join in the fun too!  We will be making wreaths for the coming Holiday season soon.  
Get full information on our website fromthesummersgarden.com

Saturday, September 14, 2019

JOIN US IN THE NEW LEAF SPHERE STUDIO

                                                   CLICK PHOTO FOR VIDEO

20" Leaf Sphere Studio   $55 per person
SATURDAY, September 21 9:00-12:00 noon and Sunday, September 22  1:00-3:00 pm
The Leaf Sphere Studio is a two-day studio starting on a Saturday morning from 9:00 -12:00 noon and finishing the next day on a Sunday afternoon from 1:00-3:00 pm.  We'll sculpt and build the leaf sphere on Saturday and add finishing touches on Sunday.
The sphere is quite strong when fully cured and can remain outside year-round.  The possibilities for integrating them into your landscape are many, including use as a sculpture, pot trellis, lighting ...even a fountain.
More info and enroll:

AUTMN INTO WINTER WREATH WORKSHOP

PERMANENT AUTUMN INTO WINTER WREATH

Thursday, September 26 7:00-9:30 pm
or Saturday. October 5 9:30-12:00 noon
Make a unique autumn into winter wreath for your door or your mantle. Choose from a selection of permanent botanicals to make your own autumn wreath. Because of this, it can go inside or out and won't make a mess. The inclusion of wintery stems and additional of holiday florals gives you the choice to leave it up for the holidays as well simply by switching out a few key components

$45 per person

Sunday, September 1, 2019

HANDMADE PAPER STUDIO THIS COMING WEEKEND!


The garden is just full of cool nature bits for handmade papkermaking from scented herbs such as lemon balm, basil and mint to stunning muli-colored zinnias. We have one more studio this season. Come join the fun.
HANDMADE PAPER STUDIO $65 PER PERSON
SATURDAY, SEPTEMBER 7 9:00-12:00
SUNDAY, SEPTEMBER 8 1:00-3:00
The Recycled Handmade Paper Studio provides a hands-on exploration of the craft of hand papermaking using natural elements from the garden and recycled materials. You will learn how to make your own paper with the pouring technique and to make molds for casting paper pulp. Participants take home 4-5 items including sheets of unique papers, cast ornaments, and beautiful molded paper bowls. This studio meets for two sessions on Saturday morning and Sunday afternoon. Materials and equipment provided.

Tuesday, August 13, 2019

LIGHTED WELCOME GARLAND WORKSHOP

Now that the days of summer are getting shorter and it starts to get dark earlier, thisd lighted garland is a nice touch to brighten the impending gloom.


LIGHTED WELCOME GARLAND $35
THURSDAY, August 22 7:00-9:30 pm

This simple indoor/outdoor garland will offer a cheery welcome to your home or garden. Select concrete oraments and paint them your way with exterior latex paint. Give them a finish stain and wire them to a garland base strung with twinkling rice lights. A welcome sign provides the central focal point. A nice addition to a garden gate or arched above a doorway or window. Easy, fun and very cool!


MORE INFO AND TO ENROLL:
https://fromthesummersgarden.com/products/lighted-welcome-garland-2

Saturday, August 3, 2019

FUSED GLASS PLATE WORKSHOP


Rita Sherman lead a Fused Glass Plate workshop in July. It was not only fun, but very informative. Here is a short slideshow showing before and after firing of the plates. Glass is amazing stuff! 

Thursday, July 25, 2019

Grocery Store Vegetable Tray Planting Container


When the garden is not producing, I like to pick up those grocery store trays of prepared vegetables. They’re fresh, already cleaned and usually in good condition.  It wasn’t too long before I realized the plastic vac-formed dish in which they are sold, would make a perfect mold for casting in hypertufa.  The sections work well for inter-planting a variety of sedums and other easy to care for plants.  You can even use the plastic bowl that holds the ranch dip for the raised center container. 


What You Need:

Multi-sectioned veggie tray from grocery store and a smaller plastic dip container
Vegetable baking spray or oil
Plastic mixing bucket
Mud gloves
Plastic mixing bucket
Sand topping mix concrete mix or hypertufa

What You Do:
1. Coat outside of vegetable container and plastic dip bowl with vegetable spray or oil.

2.  Mix up a batch of hypertufa or use the sand mix concrete mixed with water to a clay-like consistency.  Remember, if you use sand mix, the containers will be heavier than if cast with hypertufa.

3.  Pat a ¾” thick layer of the casting medium over the entire inside of both containers.  You can form a smooth rounded edge or make an ornamented edge resembling a pie crust edge.


4. Allow to harden overnight and carefully remove the plastic molds, gently smoothing edges with gloved hands. 

5. Cure the containers outside for a week before planting with mixed sedums, thyme, moss rose and ice plant. Fill the center section with soil and place the smaller container on top for greater height in the middle.


Tuesday, June 11, 2019

CREATIVE WORKSHOPS FOR JUNE AND JULY

Take a look at these workshops we have lined up for creative fun this summer.  Fun by yourself but really fun with friends or family and they are kid friendly too!Here's what's coming in June and July.
Find these workshops and more at 

Wednesday, May 29, 2019

Join us for our Big Hurrah June 7 and 8!


GROW HAPPY will be open 10-5 this coming Friday, Saturday and Sunday. What's new, is that we are extending our sale for one more weekend and will be open 10-5 Friday, June 7 and Saturday, June 8. 
Soggy perhaps, but with our heads above water!  
Join us for our Big Hurrah!

Tuesday, May 28, 2019

MAKE A PATIO FIRE BOWL

These easy-to-make Fire Bowls create pleasant soft lighting for an evening dinner on the patio and can really help to set the scene for an evening garden party.  They amount to nothing more than a concrete bowl filled with decorative rocks that conceal and inexpensive Tiki-type torch that burns oil lamp fuel.  They can be left outside all summer, rain or shine.

What You Need:
-plastic for covering work surface
-4 - 5 assorted sizes plastic bowl forms
-1 bag sand topping concrete mix
-plastic mixing pail
-vegetable oil with brush                                                                                            
-mud gloves
1 bag large landscape rocks

Search for both of these on line on-line:
-Clean Burn Torch Oil
 -4.5 Tiki Torch canister with wick 

What You Do:
1.  Spread out the plastic to protect your work surface.

2.  Use the brush to coat the inside surface of your plastic bowls with oil.   You can use plastic salad bowls, plastic planting containers, even take out salad bowls. This gives you an interesting assortment of sizes.

3.  Put on the mud gloves and pour dry sand topping mix into plastic pail. Add water slowly in small amounts and mix to a plastic clay-like consistency so that it does not slump or is not runny.  Mix in smaller amounts rather than the entire bag at once. 
4.  Start packing an oiled mold with handfuls of the concrete mixture. Cover the bottom about 1-inch thick and then build up the sides going around the bowl until you reach the top.  Smooth of the top edge by placing your four fingers inside the bowl and your thumbs on the outside.  Move along the edge smoothing as you go. 
TIP: Gravity will pull the heavy mixture down the sides of the bowl as you work. This can be frustrating since we want the bowl to go to the top of the mold.  A simple trick to resolve the slumping issue is to walk away for 20 to 25 minutes.  By leaving the concrete alone, it will begin to set and crystalize, getting stiffer in the process.  You will discover it to be harder and more receptive to being pressed to the top edge of the bowl.

5. As the concrete hardens, smooth surfaces to your liking and poke two to three drainage holes on the bottom of the bowl. You can choose to leave a smooth simple rim 
or give it a decorative edge similar to a piecrust edge
6.  Allow to harden overnight.  Gently tap the edge of the plastic mold with your fist to free it from the harden concrete.  Do this all around the bowl form.  Invert the bowl on a table and give it a few gentle taps.  The plastic mold should pop right off.  Clean up edges by rubbing with a brick or a stone.  

7. Place one layer of the decorative stones in the bottom of the bowl. Fill the torch canister and give it a test light to ensure it work and looks good.  Then place it on top of the layer of stones. Fill the bowl to the top with stones, totally concealing the torch cannister. Only the wick should show in the center. 

8. Position the finished firepot in a safe spot where it can be enjoyed all summer. When not in use, keep the wick covered with the cap provided with the canister to reduce evaporation of the oil and to keep the wick from getting wet.

TIP:  I like the Tiki Clean Burn Oil.  It has no smell and can be used inside or outside with no messy smoke or soot.  The Bite-fighter oil is very smoky and leaves a black sooty mess.  It may do an effective job keeping the bugs away, but it will  keep people away too!


Thursday, May 23, 2019

Happy Pot Create-It Activity


This Saturday, May 25 you can paint your own GROW HAPPY pot during our Create-It event.
Pick a potted foreget-me-not 
and paint the happy face for $10. 
1:00 - 3:00 pm

From the Summer's Garden Spring Sale

8601 Barkley St in Overland Park, KS
913-579-5395

Sunday, May 19, 2019

HAPPY PLATE CREATIVE WORKSHOP


FUSED GLASS HAPPY PLATE WORKSHOP
THURSDAY, MAY 23 7:00 -9:30 PM $40
Grow happy learning how fused glass is made. Rita Sherman will explain the process and show you how to make your own fused glass Happy Serving Plate measuring 8" X 8". At the end of the session, she will take the finished plates home to fire at her studio and bring them back to FTSG the following weekend.

Tuesday, May 14, 2019

A LITTLE SEED...


Guest Artist: LYNN BAXLEY


Lynn sees textures everywhere. They add dimension to her glazes and reflect the source of the imprint. She is always looking for new “tools” to transfer texture to her pottery pieces. Her pieces are both functional and whimsical and will bring color and visual interest to your home or garden.
Lynn and a wide rnge of ceramic pieces for both inside and out. Stop by GROW HAPPY to see them all!
We're in the middle of our Spring Sale
and are open 10 -5 every Friday, Saturday
and Sunday in Mayt to June 2.
From the Summer's Garden
8601 Barkley Street Overland Park, KS 
913-579-5395

LEAVE A TRAIL OF HAPPY


Guest Artist: RITA SHERMAN


Need a fun one of a kind gift? Rita Sherman takes inspiration form birds and nature, adds a touch of whimsy, and an uplifting saying to make her little bird whimsies. Take a look her fused glass night lights, a nice way to add soothing lighting in dark areas.
Rita loves inspirational sayings and collects her favorites. She uses a screen printing technique to print these on glass.
You'll find these and more of Rita's glasswork at
GROW HAPPY, our spring sale.
Open 10-5 every Friday, Saturday and Sunday in May
8601 Barkley Street
Overland Park, KS 913-579-5395

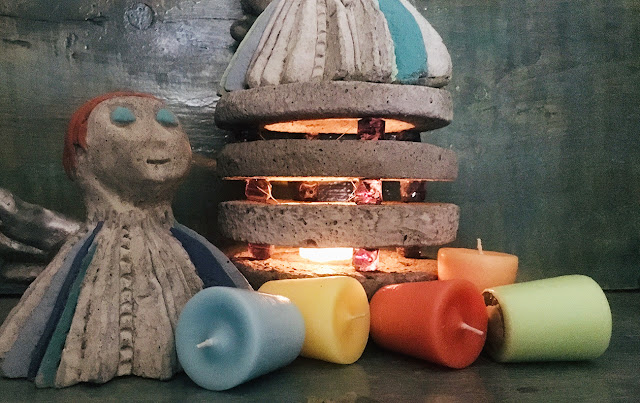
Guest Artist: LORI WOODS FROM 5B & CO CANDLEMAKERS


Lori Woods from 5B and Co. Candlemakers has prepared 5 delicious scents for each of the colors of the spring color palette this year. Leading the group is APRICOT BASIL, the perfect choice to pick up the 2019 color of the year, Living Coral. Next is HONEYSUCKLE in soft lemon, RAINDROPS in powder blue , POPPY in warm red and LIME BASIL in light green. Wonderful scents in a beautiful spring color palette. See these signature scents at GROW HAPPY and visit Lori's shop in Brookside for an entire wonderland of glorious scented candles, accessories and gifts.

Sunday, May 12, 2019

Gursst Artist: NATALIE THOMAS

What makes pottery artist Natalie Thomas HAPPY? Being able to create with clay and sharing it with those around her.
For this spring's Growing Happy event Natalie has incorporated pieces from her driftwood collection and textured clay wings to create whimsical hand built dragonflies. They are perfect for indoor and outdoor decoration.


Natalie‘s handmade earring holders are a charming and functional way to store your earrings. Since they also have a bowl or open vase shape it’s a perfect place for rings, make up brushes, hair pens or even flowers.


Check out these cute chicks! You don’t have to be a farmhouse lover to enjoy these chickens. Each of them are created on the wheel and given a fitting name for their personality. They can be displayed free range outside or in their roost inside.

Friday, May 10, 2019

Guest Artist: JAKE MARSHALL

I received one of my art degrees from the University of Wisconson-Eau Claire. While I was attending that school, there was this guy in the Publications department who bought one of my pieces in a student art show. I got a job teaching high school art in Burlington, WI. One of my star art students was a guy named Jim. Jim went into graphic design and
and also graduated from UW-EC. He was hired as an intern by the same guy from Publications who bought my piece of artwork. After some time, this guy moved to Overland Park to do advertising design for Halls department store. 
Just last week, he showed up at GROW HAPPY and introduced himself as Jake Marshall. He is broadly talented and is a accomplished watercolor artist. Jake will have both framed pieces and beautiful cards at our sale just in time for Mother's Day. 
Jake’s painting style reflects his sense of design. He is attracted to nature, especially the bark pattern of birch trees. He also likes to paint ethereal, misty landscapes and is a member of the Kansas Watercolor Society.

Visit us at GROW HAPPY this weekend!  
Open 10-5 Friday, Saturday and Sunday.
From the Summer's Garden
8601 Barkley St
Overland Park, KS
923-579-5395

NEARLY FELL OFF MY UNICORN...


Tuesday, May 7, 2019

Saturday Create-It Event

Our create-it activity for Mother's Day weekend at
GROW HAPPY, gives you the chance to make mom a happy, sparkling fused glass suncatcher with glass artist Rita Sherman. Better yet, bring mom along to make her own!
This project is available Saturday, May 11th between
1:00 and 3:00 for a cost of $10. Rita will take them to her studio to be fired and return with them the following weekend.
GROW HAPPY Spring sale
From the Summer's Garden
8601 Barkley Street
Overland Park, KS 66212
913-579-5395


Monday, May 6, 2019

Guest Artist: LAURIE MELLENBRUCH


Laurie Mellenbruch considers her colorful fused glass jewelry "wearable art." She often gets lost in the beautiful iridescence of a puddle following a rainstorm or a butterfly's wings. Laurie discovered the essence of all of these in dichroic glass, a combination of different minerals coated on the glass to create this shimmering color.
More info on Laurie's work: www.artglassdesigns.net
You'll find a nice selection of Laurie's dichroic glass jewelry at GROW HAPPY, our spring sale.

Open 10-5 every Friday, Saturday and Sunday in May.
From the Summer's Garden
8601 Barkley Street in Overland Park, Ks 66212
913-579-5395


It's Lily of the Valley time!

Lily of the Valley is now at it's peak in our garden.

Friday, May 3, 2019

Saturday Grow Happy Create-It Sessions


Our first fun weekend activity for GROW HAPPY is sponsored by South 20 Studios. Come design and assemble your own Grow Happy tin flower. This free, make and take project is available on Saturday, May 4th from 1-3pm while supplies last. 

GROW HAPPY at From the Summer's Garden
8601 Barkley Street
Overland Park, KS 66212
913-579-5395