Monday, May 19, 2014

SUMMER HYPERTUFA AND HANDMADE PAPER STUDIOS START IN JUNE

LEAF PLATTERS-SPAS FOR THE BIRDS!


Birds love to have water nearby in every season, but in the summertime, they seem to especially enjoy water for frequent drinking and refreshing splashes.  A leaf platter water basin is ideal for this purpose because the water is shallow and the decorative leaves attached to the side made the perfect sundeck for the birds to preen and relax.  In our Hypertufa Studio you learn to make your own leaf platter. This is a creative, fresh twist on typical bird baths and a point of interest in your garden that's far and above typical bird bath projects.


You begin with a stroll through the gardens to collect the leaves you'll use in your casting. My favorite leaves for this project are hydrangea leaves because they can be found in multiple sizes are tough and have deep veining on the back. 
We cast individual leaves on smaller mounds of sand to use as the ornaments for the leaf platter.


The leaves are arranged face-side down on a mound of damp sand.  This hump of sand makes the bowl shape to hold the water in the finish water basin.  The leaves can be arranged in an accidental or an ordered fashion.  Once the mound of sand is covered with leave and thin layer of concrete is pressed onto them to hold them down and capture a perfect impression of their shape and veins in the concrete. 


To finish the platter, a thick layer of hypertufa is patted onto the layer of concrete to add support  and shape the outside of the plater.  The "sandwich of the concrete and the hypertufa make a perfect combination.  The concrete captures the leaf  detail and allows the basin to hold water. The hypertufa adds shape and heft without the weight.Usually basin bottoms are left plain but here old rosette irons were used to stamp a design in ot the bottom and wine corks were inserted as feet.Lyn used huge hosta leaves forger large elegant basin.
Caroline and Chris had us make this custom super large leaf basin.  It makes a stunning water feature with or without  a fountain and pump!Don't miss the chance to make your own leaf platter this summer.  

Join us in one of our Hypertufa Studios at From the Summer's Garden 
Get sign-up info here! This is a great way to reconnect with old friends or enjoy your own personal "staycation." 


Sunday, May 18, 2014

GARDEN STUDIOS AT FROM THE SUMMER'S GARDEN

The Garden Studios at From the Summer's Garden are held during our Spring Sale and conducted by our artists. It give cusotmers a chance to join in on the creative fun. Our final weekend for A GARDEN OF GOOD wil be this coming Memorial weekend, Friday, Satuday, Sunday and Monday and we'll be open 10:0-5:00. 


Saturday, May 17, 2014

3 COOL WAYS TO USE A CAINFUSIONS SPOONREST


John Cain from CainFusions absolutely LOVES their large spoon rest because it will handle any and all of your utensils in the kitchen. It can also be used as an elegant candle holder or used to nest a coordinated colored bowl into one when entertaining. Sleek, contemporary, & safe to run through the dishwasher! Now available at A GARDEN OF GOOD!


Thursday, May 15, 2014

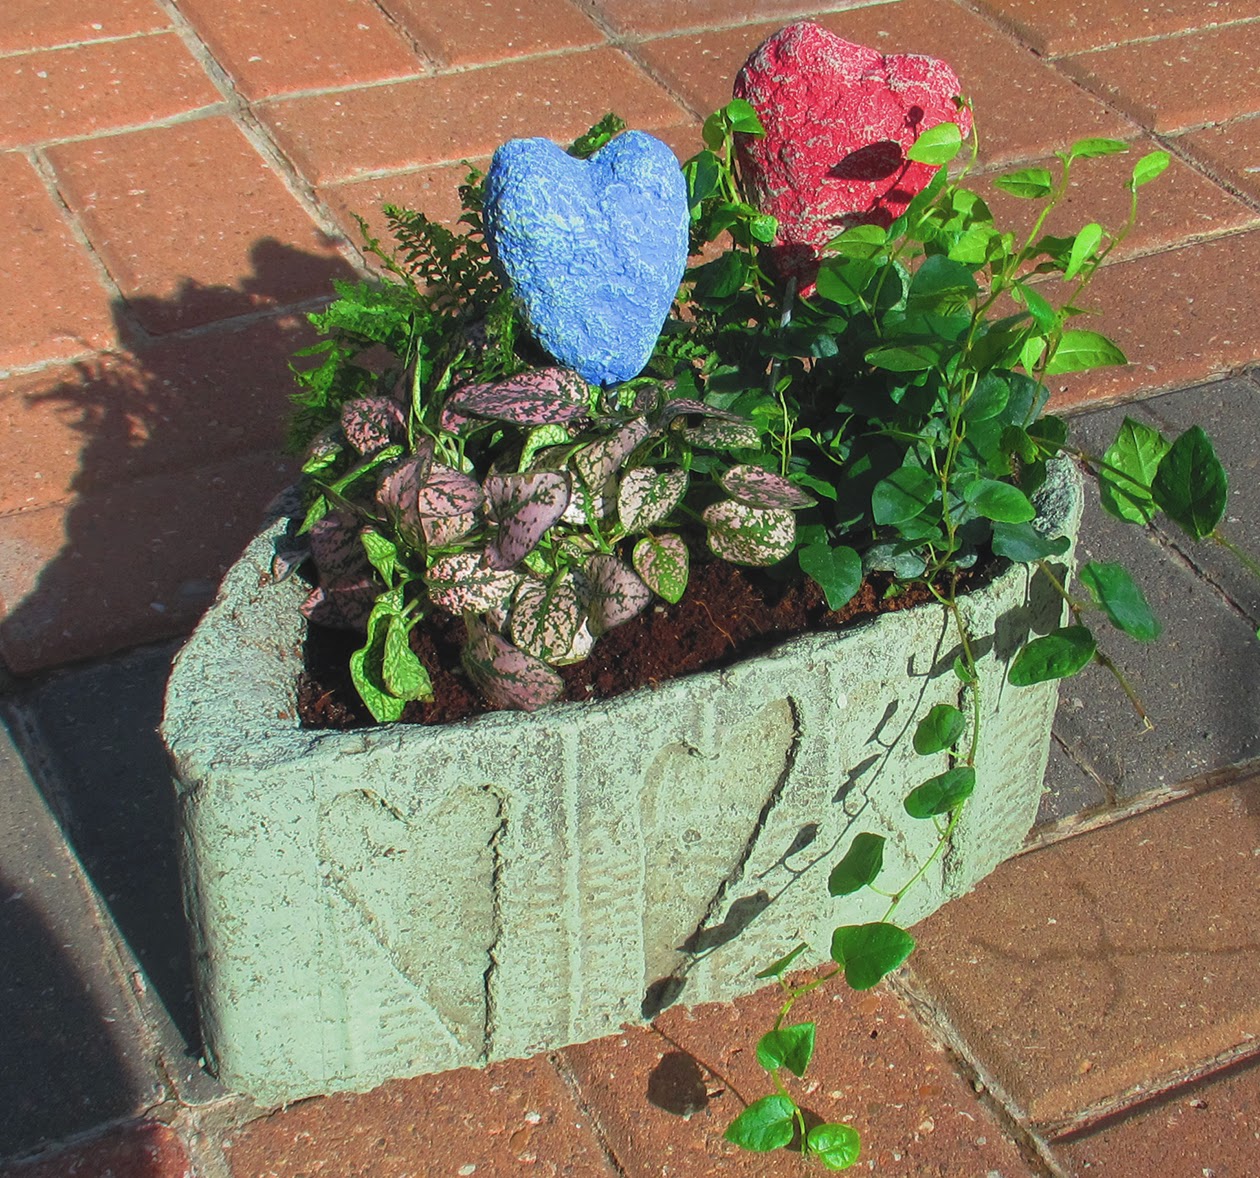
COME AND MAKE THIS TUFA HEART PLANTER!

You can make your own heart-shaped tufa planter with Steve this Saturday,
May 17 from 1:00-3:00 at 
A Garden of Good and...it's just $20!


Heart-shaped things are popular so here’s something fun for you to make for your own garden of good.

What You Need:  

2” thick piece of packing foam around 8” x 12”.  Styrofoam will work also but is more expensive.
A corrugated cardboard box with cover flaps at least 15” long
Small saw
Hot glue gun
Duct tape
Marker
Scissors
Motor or vegetable oil
Old paint brush
mud gloves
plastic mixing bucket and plastic to cover work surface.
Your favorite hypertufa recipe. Here’s mine:
You can also make this out of Sand Topping Concrete Mix but it will be heavier!

What You Do:

1. Draw a free-form heat shape on the pieces of packing foam and cut out with a small saw.  This will become the base of your mold.

2. Next cut the two long long flaps off of the top of your cardboard box.  Trim them down to no more than 6” wide.  The narrower your strips of cardboard, the shallower your planter. Note” Be certain the corrugation is running parallel to the 6 inch wide of the cardboard.  This will allow you to easily roll up the two strips. Rolling the two cardboard strips makes it easier to form the sides of the mold.

3.  Place one end of the first cardboard strip in the center “V” of your heart-shaped foam.  Run it up and around the top of the heart down to the point and cut the strip
where it meets the point.  Repeat for the other side of the heart with the second cardboard strip.


4.  Hot glue the two strips onto the foam base.  Use the duct tape to seal the bottom edge where the cardboard meets the foam and the two joints where the cardboard flaps meet.  

Your mold is now ready for casting.

5.  Cover your work surface with plastic sheeting and put on your mud gloves.
Coat the inside of your heart mold with oil using an old paintbrush.  This will serve as a release agent for your planter.  

6.  Mix up hypertufa or concrete to a clay-like consistency.  Remember, add water sparingly!

7.  Pat a 1” thick layer of the material across the bottom of your mold. Then begin pressing it against the sides of the mold by the handful until you reach the top edge of the mold.  Try to keep your sides thinner than the bottom. The finished planter will look nicer and weigh less.   Three quarters of an inch is a good thickness.  It helps to look at a ruler so you really know just how thick this is.

8.  The top edge is very important because it is where you grab the planter to pick it up.
Pay careful attention to the appearance of the top edge, making it consistent and smooth.

9.  At this point you can punch drainage holes in the bottom with a pencil.  It might be smarter to leave the bottom intact while you use the planter inside as a cachepot and then punch a drainage hole later in spring when you put the planter outside.  Allow the planter to become stiff and cure for three to four days. 


10.  When your planter is completely hard, remove the mold and discard it.  Use a brick to smooth rough edges to shape the planter as you please.

11. Take a trip to the grocery store or greenhouse for small plants featuring reds, pinks and whites and plant up your Valentine container.


TIP: You can ornament the out side of your planter by cutting out small hearts from extra cardboard and hot gluing them to the insides of your mold.  Do this BEFORE you coat the mold with oil. 

TIP:  Make heart shapes from extra tufa or concrete and skewer with wire to make decorative picks to go with your planter.  


Tuesday, May 13, 2014

ROBIN TOURS THE MOSAIC HOUSE

Robin recently visited her brother in Los Angeles. They were fortunate to be able to tour the Mosaic House in Venice Beach.  It is a spectacular home owned by a couple of artists, age 74 and 83.  

 front gate

     front fence


Inspired by their visit, they returned to her brother's home, dug through his broken tile stash and wood pile.  Each created a homage to the Mosaic House, Robin's is this beautiful  mirror.  Everything used in the piece is recycled.


Monday, May 12, 2014

CONTAINER PLANTS FROM HALINGS NURSERY


My favorite business partner is Halings Nursery. Each year we make a bid to create a space a the KS Symphony Designer's Showhouse.  This coming weekend is the last one for this year's show house.  If you haven't seen it yet, you should.  It is the most well-put-together house I've seen on this tour in a long time.   Our patio is out in the back.  They have made it very difficult to find, but if you persevere you'll find it and believe me, it is worth it!
Halings was the source for some great plants in this year's color palette for my large garden containers as well.  I use my own amaryllis for the thrillers but found these very healthy plants at Halings:

1. THRILLERS:  RED AMARYLLIS
                       PINK ARCHANGEL ANGELONIA
                      (it is really Radiant Orchid
                       -2014 color of the year)
                             
2.  FILLERS:   LEMON LICORICE HELICHRYSUM
                     PURPLE ALYSSUM
                     ORCHID CALIBRACHOA
                     SUNRISE ROSE LANTANA

3.  SPILLERS:  BLUE MY MIND EVOLVULUS
                      BRILLIANIT SCAEVOLA

Thursday, May 8, 2014

Gardn Studio with LISA FREEMAN: BLOCKS!

 GARDEN OF GOOD MATH LESSON:
 PLUS
PLUS
 PLUS
 PLUS
 EQUALS LISA'S BLOCKS!

Come join the Garden Studio
 with Lisa Freeman
FRIDAY, MAY 9
10 - 11:30
and
1:30 -5:00
IT'S A GOOD DEAL!


Wednesday, May 7, 2014

New for the Garden from Steve at A GARDEN OF GOOD


Two new garden stakes...

striped leaf stepping stones...
...and snappy message blocks that can be a garden stone or stand up to make a statement!

Tuesday, May 6, 2014

A Garden of Good Feature Artist: LEANNE from SOUTH20STUDIOS


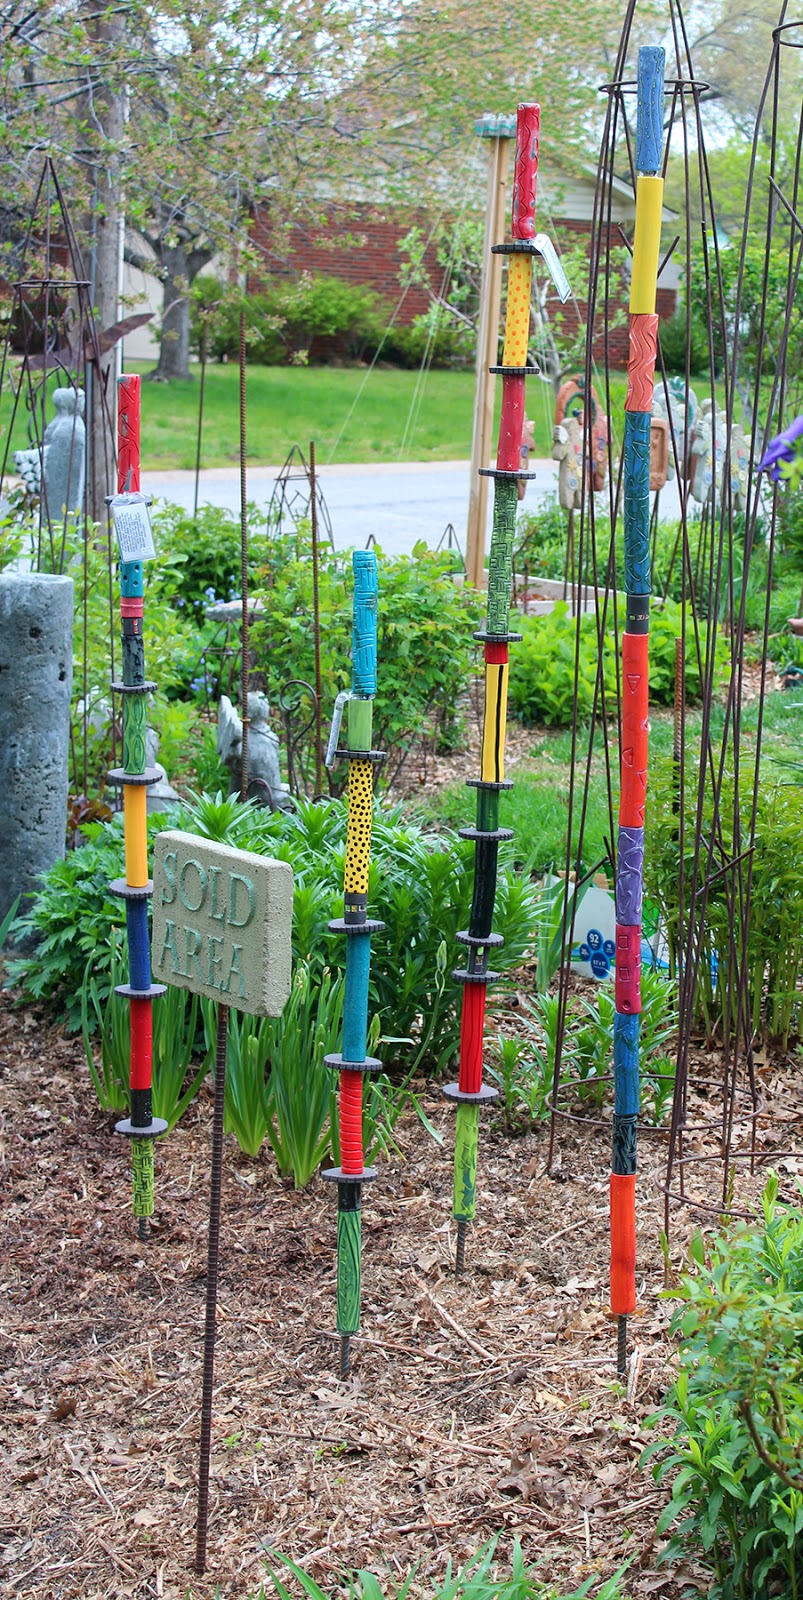
From south20studios wabi-sabi (flawed beauty) tree totems.  Made up from one of a kind, hand textured and glazed tubes.  They provide funky, fun color to brighten your garden.  They have been high temperature, multi-fired to achieve the surface designs and can remain in place year long.  Use them as indoor sculpture by standing in containers.  Either way, a wabi-sabi tree can help us to remember to appreciate the flawed beauty and imperfection in everything around us. 


When an ordinary heart just won't do...we can find a heart for you!  Hearts with a skeleton, a mouse, an eye.....find one to capture your message.....
Made with hand cut glass, glass bead, oddities, and coordinating grout.  Finished with hanger suitable for hanging on the wall.  Capture the essence of your loved one ( or the one that shattered your heart)....odd, original, one of a kind!  .....and don't forget mom!


Put together junk yard car hoods and marble collections, and you get these torch cut flowers from LeAnne at south20studios.  LeAnne walks the junkyard to find the perfect hoods.  She uses the original color and finishes on the metal.  (Sometimes she can even tell you what vehicle they came from!). The metal is free-hand torch cut into flower shapes.  The flower centers are a crazy collection of assorted glass marbles, set in concrete.  Stake them in garden, or pot them in a planter for a burst of fun and color. 

Friday, May 2, 2014

COUPON FOR KAREN SKILLETT FAIRY POT

Print out this coupon and bring with you to our special event Saturday May 3 from 1:00-3:00!

Thursday, May 1, 2014

ANTIQUE CHOCOLATE MOLDS

In the nineteenth century, a gift of chocolate was a special treasure ( AS IF IT ISN'T NOW!)  and every small European village had a chocolate shop. Chocolate was molded in all shapes and sizes. The early molds were hand-hammered over castings created by individual artisans. The sculptor was either commissioned or, in some cases, in the direct employ of the chocolate factory who would provide him with a studio. Some large factories evolved, first in Germany, and later in France and the United States.


Casting figurines from molds has been a German tradition since the late 1800’s. Originally paper mache was pressed into wooden molds and allowed to dry. Some of these hollow pieces were then dipped into plaster, which dried to a smooth, but very fragile finish. In America, the Pennsylvania Germans substituted solid plaster for paper mache, and often used chocolate molds for the forms. Making “Chalkware” figures using antique chocolate molds continues to this day.

This year, Karen has taken casting using antique chocolate molds one step farther.  She selects only unique molds, casts them in CONCRETE, and whimsically decorates them, creating beautiful and nostalgic decorations that remind us of our treasured childhood memories. The resulting figurines make wonderful additions in planters and fairy gardens.
We are featuring 
one of Karen's 
cast concrete rabbits 
as part of our
Fairy Pot Project 
SATURDAY FROM 1:00-3:00.  
It is a great deal, so come join us!