Wednesday, July 26, 2023

FAMILY MILESTONE ACTIVITY


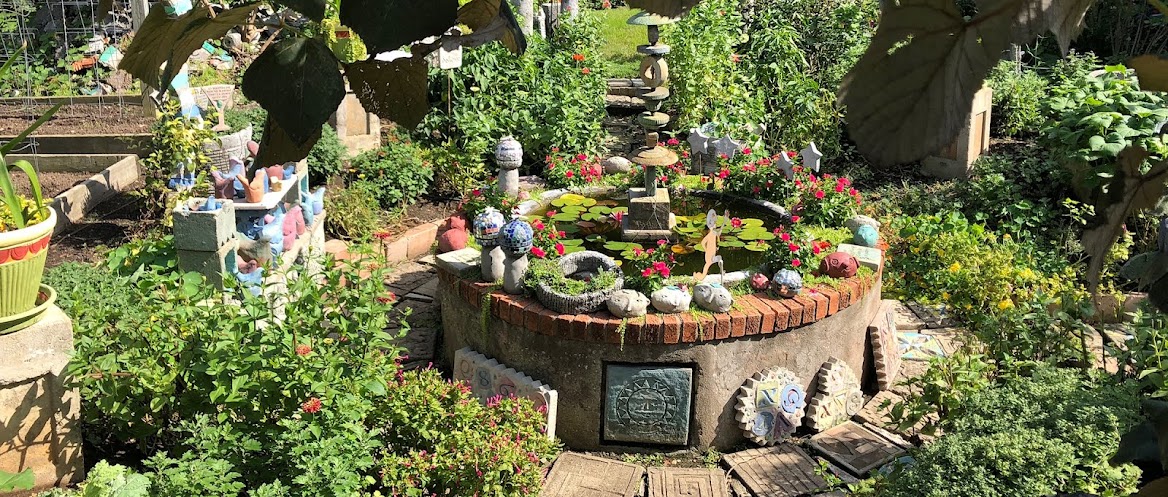
 I was “chosen” by my family from various towns in north central Wisconsin, to be the host for a summer gathering.  It was an exciting prospect and somewhat of a milestone since this group seldom is gathered in one place and was probably the last time my mom would be able to travel the distance. While we did the usual visits to popular KC attractions, I felt we needed to do something creative that would mark our time together and at the same time provide a setting for chatter, laughter, and interaction.  One day during the visit, I gathered them and announced we were going to do a creative project together. We were going to create a series of sculptural vertical stakes that would be installed in my garden, that’s right, they were to stay together as one piece and would someday be passed on to other family members. 

 Forging through the whining and complaints, we soon were so engrossed we weren’t even talking at first. Turns out it worked like a charm and my family can’t stop talking about the meaningful fun they had.  This group project idea could work with almost any activity, the key is to be organized and prepared in advance, so it runs smoothly and is a roaring success! Here is what we did.


I am a gardener who loves working with cement, I used this for inspiration and technique.  You can use what you have and do to make the activity your own. Before the guests arrived, I designed a series of garden stakes that were conceptual stems and leaves- very simple shapes cast from insulation foam molds and sand concrete mix.  The stems featured a recessed center rectangle perfect for glass mosaic.

Family members were given different stem sizes and were asked to paint in color where they wished from a limited color palette.   

While the paint was drying, they collected glass pieces from a glass buffet full of a rainbow of colored glass and mirror fragments.

Each person cemented the glass onto their stem and grouted it. 


The final step was to add paint to the leaf shapes and fit them onto the stems.  I installed the stakes in the garden early in the morning on the day everyone was to return home.  The last day's surprise was to see their finished work on display as a milestone of our fun time together.


Saturday, May 13, 2023

CLOUDS and SUNSHINE PIE

The herbs in the garden are springing forth anew and a fat juicy Meyer Lemon ripened on my little tree and that nailed it. It was time to make CLOUDS and SUNSHINE pie. This is not your grandmother's Lemon meringue pie. It is made with an infusion of lavender, bergamot, and lemon balm and features not only lemons but a lime and a grapefruit as well.


 CLOUDS AND SUNSHINE PIE


Ingredients:


Pie Filling


2 cups herbed water

(see instructions)


1 cup white sugar

4 TBS all purpose flour

4 TBS cornstarch

¼ tsp. salt


6 egg yolks beaten  


Zest from 1 lemon, 1 grapefruit and 1 lime

Juice from  same lemon,  grapefruit and lime

3 TBS butter


Meringue


6 egg whites

½ tsp cream of tartar

½ tsp vanilla

¾ cup sugar


1.  Make herbed water.   Gather 3 six-inch sprigs of lemon balm, 3 of lavender and

3 of bergamot (bee balm).  Rinse and pat dry.  Bring 2 ¼ cups water to boil.  Turn off heat and add the herbs.  Cover and allow to steep for at least 4 hours or overnight.   Strain liquid and reserve liquid.  Discard herbs.


2. Prepare and roll out  single crust pastry for 9” pie.  Bake in 450 degree F oven for 10-12 minutes or till golden.  Cool on rack.


3.  For filling.  Separate egg yolks from whites; reserve whites for meringue.  In medium bowl wisk together egg yolks. 


4. In medium saucepan combine sugar, flour, cornstarch and salt.  Gradullay stir in the herbed water and mix well.


5.  Cook stirring constantly over medium heat until thickened and bubbly.  Reduce heat.  Cook and stir 2 minutes more and remove from heat.  


6.  Add about ½ cup of the hot filling to the egg yolks and whisk to mix.  Immediately return to saucepan and mix into the rest of the filling and cook 2 minutes stirring constantly.  Remove from heat. 


7.  Add the butter, zest and juice to the hot mixture in the saucepan, stirring thoroughly to combine.


8.  Turn the hot filling into the baked pastry shell.  Place in a 350degree F oven for 10 minutes to evenly warm the pie.


9.  Meanwhile, whisk sugar and cream of tartar into the egg whites in a metal bowl. Place over simmering water and gently warm the mixture unitl sugar  is dissolved and whites are warm to the touch.  Add vanilla and beat hard for 4 minutes until mixture is thick and satiny smooth.


10.  Remove pie from oven and immediately spread the meringue from the edges to the center of the pie.  Bake in the 350 degree F oven for 10-15 minutes or until meringue is golden.  Remove from oven and allow to cool before serving.


Saturday, March 25, 2023

REVERSE MOSAIC TABLETOP

 Reverse Mosaic Tabletop  

This is a fun easy project that gives pleasing results and helps to give new life to discarded items. My neighbor gave me a triangular rebar stand he was going to throw out.  As he was handing it to me over the fence, I thought that it would make a great stand for a small garden table, but what to use for the decorative tabletop?  Answer:  A cast reverse mosaic slab of concrete!

 What You Need:


2-inch insulation foam 

Hand saw

3-inch box nails

marker

Assorted colored glass, shells, marbles…anything you want to use for your tabletop mosaic as long as it is reasonably flat.

Vegetable oil and a brush

Bag of sand topping concrete mix

Cement trowel and plastic mixing bowl

Urethane glue, if necessary

Natural colored sanded grout, if necessary


What You Do:


1.    To make a slab of any shape, make a mold using a sheet of pink or blue insulation foam from the home improvement store. It cuts easily with a hand saw and goes together with simple long nails.


2.    Decide what shape you would like for your tabletop; circle, square, free form, etc. Draw the shape on the sheet of insulation foam using the marker. Draw the same shape 2 inches larger all around.  Cut out the outside shape first using the hand saw and then cut out the inside shape, so you have a 2-inch-thick frame.  Use nails to attach to a base piece of foam.  This is the mold for your tabletop.  Brush it with vegetable oil as if you were oiling a cake pan. 


3.    This technique is called “reverse mosaic” because the mosaic elements are placed into the mold first and facedown, so you see the bottom sides. Cover the bottom surface of the mold with mosaic elements, staying at least ¼” from every edge. 

4.    Mix a manageable volume of sand mix with water to a consistency of thick frosting using the trowel and plastic mixing bowl.


5.    Be careful to add water sparingly, it is easy to add too much.


6.    Gently scoop mixed concrete over the surface of your mosaic pieces making certain to completely cover them.  Use the trowel to press the concrete over everything until the surface is smooth.   You can tap or bounce the mold to settle the concrete. 

7.     Mix up more concrete until the mold is completely full.  Smooth off the top with the trowel.


8.    Usually, you can wait for the mold to set overnight and take out the casting, BUT…don’t do that.  Because we want to be certain the mosaic pieces are firmly embedded in the surface of the tabletop, let the mold sit untouched for three days.  The cast concrete will be significantly stronger, and then you can easily remove the tabletop from the mol with less chance of losing pieces. Use gloved hands to smooth the edges.


9.    If some mosaic pieces come free, replace them using urethane glue.

             (Goop or E6000).  


10. If there are gaps around some of the mosaic pieces because the concrete did not make it around them, you can mix a small amount of sanded grout and fill the gaps.


11. Position whatever you are using for your base and then add your new tabletop!


Wednesday, February 1, 2023

MEMORY KEEPING COLLAGE STEPPING STONE

 MEMORY KEEPING COLLAGE STEPPING STONE

 Here’s a fun activity for mixed ages that will help to preserve memories of any significant event. In this case, a recent trip to the beach.  A pretty much-given activity when you are visiting a beach is to walk along the shore collecting shells, bits of coral, sea glass- anything of interest.   On my recent visit, I made a point to search and discover something I could add to my stash each day.  

By the time I headed home, I had a pretty good collection of stuff including leftover coins and beer caps from the local beers I had the pleasure of sampling.  Anything permanent and “outdoorable” should work.  


PHOTO 1


What You Need

-Cool stuff you’ve gathered to feature in our stepping stone  

-Two 2-inch thick slabs of foam sheeting.  You can buy this in the form of foam insulation at the home improvement store but it is much less expensive to recycle blocks of shipping foam you may have received when opening a package.

-Sheets of newspaper, a Sharpie, and a pair of scissors

-Keyhole saw

-3-inch nails

-brush and vegetable oil

-plastic bowl for mixing concrete

-bag of sand topping concrete mix

-mixing trowel

-mud gloves and a plastic-covered work surface


What You Do

1.  Design a simple shape for your stone using the Sharpie and sheets of newspaper.  Remember that your designs need s to be smaller than your sheets of foam.


2.  Keep your shape simple with no thin portions that stick out.  These will break off in no time.  Cut out the shape with scissors.  It will serve as your pattern and the base to plan your design. 


3. Trace the pattern in the center of one of the sheets of foam with the Sharpie and cut out carefully.  Try to cut the shape out of the foam in one piece,  Remember, it is the negative or outside portion that will become your mold, not the shape itself. 

4.  Cut the outside shape into two pieces.  This makes it much easier to remove the casting after the concrete has hardened.


5.  Use the nails to stick the mold sections onto the second piece of foam, which will become the base of the mold. Use them as if they were giant pins.

Then use the brush to coat the bottom and sides of the mold with vegetable oil.


6. Lay out your found objects on top of the pattern piece. This will guide you when it comes time to insert them into the wet concrete.  You do not have a great deal of working time before the concrete begins to set.  Having a layout plan ahead of time will ensure you get it all safely inserted before this happens.

7.  Scoop about 1/3 of a bag of Sand Topping Mix into a plastic mixing bowl.  Add water and mix to a thick, smooth paste using the trowel.  Stir at least 25 times to ensure it is smooth and homogenous. Pour immediately into the mold up to ¼” from the top edge.  Lift an edge of the mold and gently tap several times to remove air bubbles.  The top surface should be completely smooth.


8.  Gently insert your objects according to your layout plan, pushing them into the concrete.  Remember, you will be walking on this stone, so make sure nothing is sticking up too far to cause you to trip!  If something decides to sink, no worries; fish it out, wash it off, and try again. 


9.  Allow your completed design to set and harden overnight.

10.  The next day, carefully remove the nails to preserve the mold.  You can use it several times if you wish. Gently wiggle and remove the two side sections of the mold.  Invert on your work surface and left off the base piece of foam.  Smooth edges with gloved hands and clean off your objects with a toothbrush.


11.  Let the stone cure for a couple days and it will be ready to place in your garden.


Wednesday, October 19, 2022

10  GARDEN INSPIRED COCKTAILS THAT WILL SURPRISE AND DELIGHT YOUR GUESTS 

Artisan cocktails are one of the hottest trends in home entertaining. What will be your special new drink at your next gathering?  You can turn to your own garden for the answer!  You may already have plants growing in your garden that can be used to create a unique, refreshing cocktail.  Here are 10 exciting new cocktails I have made from fruits and herbs from my garden.


Here is the link to the GARDEN ARTISAN COCKTAILS presentation with recipes and photos:

https://acrobat.adobe.com/link/review?uri=urn:aaid:scds:US:bc72659a-26ac-331a-b79f-1695711ed05f

Wednesday, September 28, 2022

If you love pasta using fresh produce from your garden, this one features bell peppers instead of tomatoes. Also onion, and fresh herbs: rosemary, oregano and basil  I left out the habanero, too hot for me!


Peruvian-Style Pasta with Creamy Pepper Sauce

 1 pound linguine

salt and ground pepper

¼ cup olive oil

1 medium onion, chopped

2 medium red, yellow, or orange bell peppers,

   Stemmed, seeded, and chopped

1 habanero chili, stemmed, seeded, and chopped

1 cup shredded Italian cheese

½ cup half-and-half

½ cup milk

1 Tablespoons fresh rosemary chopped

2 TBS fresh Oregano chopped

1 TBS lime juice

1/2 cup pitted Kalamata olives, chopped

Fresh basil, chopped and shredded parmesan for garnish


1.    Bring 4 quarts of water to boil in a large pot.  Stir in pasta and 1 TBS salt.  Cook to just shy of al dente. Drain and reserve cooking water.

2.    In a sauté pan, heat the oil and add onions, peppers, and a pinch of salt.  Cook on medium-low, stirring occasionally until the onion is softened and beginning to brown, about 15 minutes. Let cool for 5 minutes.

3.    Transfer the onion-pepper mixture to a food processor along with the cheese, milk, half-and-half, lime juice, and ¼ teaspoon each of salt and pepper. Puree until smooth.

4.    Pour the puree into the sauté pan.  Add the fresh rosemary and oregano, the drained pasta, and ½ cup of the cooking water and cook on medium until the thickening sauced begins to coat the pasta, about 5-7 minutes.

5.    Serve sprinkled with chopped olives, fresh basil, and parmesan cheese.

Monday, July 25, 2022

Cast Hypertufa Birdhouse

 Amazon Prime Cast Birdhouse 


Here is a project that uses some of the many boxes one begins to accumulate when shopping on Amazon.  You can already recycle the boxes conventionally, but they just happen to make great re-purposed molds for this bird house project.  It is not the type you hang in a tree, but mount on a fence or a post instead, since it is cast using a mold made from a reconstructed Amazon shipping box and of course has a bit more weight.


What You Need:


Plastic covered worksurface

Mud gloves

i-3 assorted Amazon shipping boxes

Box knife

Scissors

Hot melt glue gun and plenty of extra glue sticks

Sharpie

Masking or duct tape

One or two 1” lengths of 5/8” PVC pipe

Pile of straight twigs

Any color latex paint

Mixing bucket

Trowel

Brick

Hypertufa recipe ( Here’s mine: http://fromthesummersgarden.blogspot.com/p/normal-0-false-false-false-en-us-ja-x_10.html)


What You Do:

Select a shipping box that is a good size for the birdhouse you’d like to make and carefully take it apart where it is glued or stapled together.


If there are staples, remove and discard them.  Use the box as is if you want a flat roof. If you’d like your roof slanted, cut two opposite sides on a slant. Reassemble the box inside out using a hot glue gun 


Glue the flaps down on the outside of the box to serve as reinforcements.  The inside should be completely smooth with no flaps. Use masking tape to cover all seams on the inside. 

Glue the PVC pipe section(s) onto the inside of the box where you’d like the hole to be.
 
I used two to make two holes, one on either side. Use pieces cut from another box to make relief designs on each of the four sides.  I used arches inspired by gothic architecture for mine.  

 TIP: Whatever you decide to do design-wise, keep it simple and repeat your shapes. Glue the pieces onto the inside surfaces of your mold using the hot glue gun. Finally, run a border of masking or duct tape around the perimeter of the box mold at the bottom and again at the top.  This will prevent the box from sagging out of shape as you construct the birdhouse. 


Cut and glue together a cardboard tray with a bottom and one-inch sides.  This will serve as the mold for the roof.  It should be 1-inch larger both ways than the dimension of your box mold. This will ensure that the roof overhangs the birdhouse.


When both the birdhouse and roof molds have been constructed, paint them inside and out with a coat of latex paint and allow to dry. Coat the inside of both molds liberally using a paintbrush and vegetable oil. Mix up a batch of your favorite hypertufa to a clay-like consistency. Pack the mold by handfuls, firmly pressing the material against the side of the mold and forming a smooth inner surface.  Be sure to apply ample material across the top edge, smoothing to create a firm, durable edge.

When the birdhouse mold is cast, move to the cardboard tray and fill it with hypertufa using a brick to evenly tamp the surface smooth.  Lay twigs into the soft hypertufa and tamp into the mold using the brick.  

TIP:  Cut twigs the same size as your roof mold and have them ready to add when casting the roof.   They lend a nice natural look as a surface texture for the roof. 


Allow both molds to cure and harden.  This may take two to three days.  Remove the mold and

allow the birdhouse and roof to cure further for one week out of the sun.  Because the roof is heavy, it may simply rest on top of the birdhouse, making it simple to lift off for cleanout at the end of the season.  


TIP: To ensure the roof stays in place, apply hot glue to the top edge of the birdhouse at each corner, immediately place the roof on top and hold until the glue hardens.  This will keep the roof in place for the summer.  To remove the roof for cleaning, simply pry the corners gently with a screwdriver.  The hot glue will give easily.


Leave your birdhouse natural or add accents with exterior latex paint and mount on a wooden platform on a post or fence.  Use the hot glue technique here also to hold the house in place for the season.