Saturday, June 29, 2013

Pigs Have the Right Idea - A Mudcoat!


What's a hot "must-have" for your garden containers that's free, available in your yard right now, and sure to keep containers cool?  Meet the humble mudcoat. It's natural, fun and very trendy - despite its rustic roots.

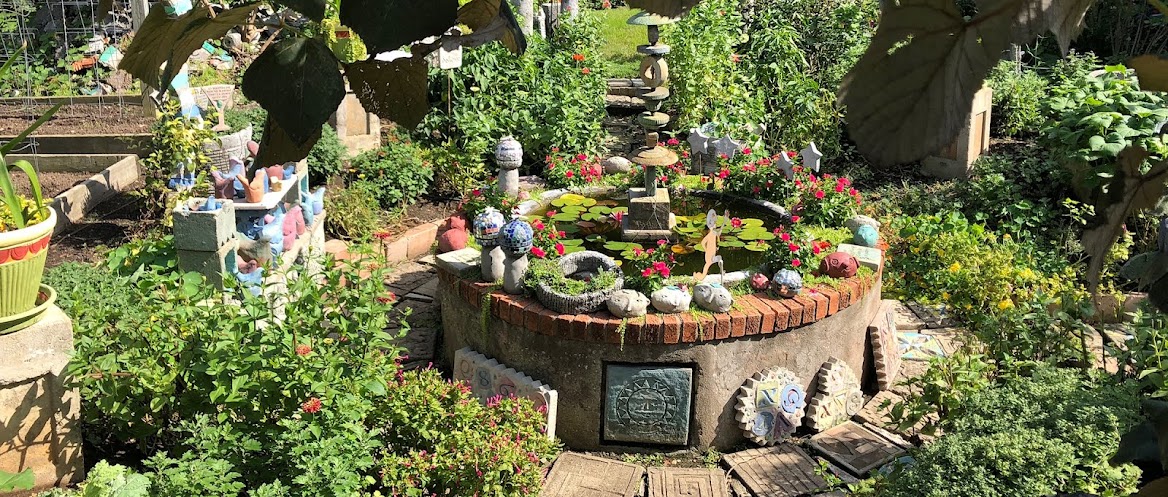
I was told by a farmer that pigs like to roll in the mud because it is soothing and cools their bodies when temperatures rise. They may do it for comfort,and don't care how they look ... but I have found that mud can make hypertufa containers look great!  In fact there's something truly special about a natural, weathered mudcoat applied to a hypertufa container.

Planting containers are available in many different materials, sizes and designs. Wondering how to enjoy the mudcoat on hypertufa this summer?


Let the plant steal the show: No matter what, I like to follow the rule that the container should play second fiddle to what is planted within.  There are times when bright color and pattern are appropriate on the surface of a container and there is nothing like good old exterior latex paint for this purpose.  Most times however, a muted, naturalfinish works best.  Time and weather usually create a nice natural looking surface but it takes a long time to get there.
Consider the finish: I usually am working with brand new containers, specifically concrete and/or hypertufa.  These are both natural finishes, but they are too clean and too gray and need something to integrate them into the garden setting. Especially those containers we make using recycled paper.  These surfaces can be changed with all sorts of finish solutions from the craft or hardware store but usually come with a hefty price tag.

Put on Your Mudcoat: I have discovered a very simple technique for giving ceramic, concrete or hypertufa a wonderful natural finish we’ll call "mudcoat".   It uses materials you already have at home in your garden…dark garden soil and water.

Creating a mudcoat:
1. Look around for a spot with dark soil, even dense clay will work for this, in fact, it is what you want versus composty loam - no mulch, potting soil or sand---just good dark soil.  Cover about 4 cups of soil with water to cover and stir vigorously, making a thick, brown, creamy goo!  Use an old window screen to strain the mixture into another plastic container and you are ready to go.

2. Wearing mudgloves, use an old brush to apply the mudcoat to the surface of your container, making sure to cover everything with a thick coating. Every surface should be covered and every hole filled, inside and out.  Eventually I found myself using just my gloved hands to apply the coating because it was easier to rub the mud into the surface of the container. 


3. Allow the coated container to dry in the sun and then you can plant it. Because the container is dry when you apply the mudocat, it really soaks it in deeply and will stay on the pot even through rain and weather.  Over time, it will slowly wash away but the deep color remains as a natural stain on the surface of your container.  You can’t get more natural than that! 

Join us to play in the mud and hypertufa materials at From the Summer's Garden - next workshop July 13 and 14


Wednesday, June 26, 2013

Recyled Paper Hypertufa - It's Not Your Grandmother's Tufa!

With the new hypertufa material, if you can name it ... you can make it. 

Tufa has come a long way, baby, and more KC gardeners are enjoying it for bird baths, creative containers and so much more. Now's the time to get your hands dirty with awesome recycled paper hypertufa material. 

Traditionally hypertufa was used for making shallow troughs suitable for growing alpines or succulents.  
Green hypertufa made with recycled paper fiber allows greater versatility and opens the door for making almost any type of planting container.  This is due to the increased plasticity of the mix which makes it stronger and easier to mold.  

Hypertufa containers are really good for growing plants who do not like wet feet such as lavender and rosemary.  Using a simple box mold provides a convenient method to create a planting container for this purpose.  The hard sides of the box make a pleasing geometric shape on the outside leaving the more erratic hand of the artist shaping on the inside of the pot for the roots to enjoy! The rim can be ornamented with stones or a texture for added appeal.  When the hypertufa has set, the mold is removed and the container is cured for a week.  Then, it is ready for planting.

Learn to make your own hypertufa containers, join us in a Hypertufa Studio this summer! Upcoming dates to get happy with hypertufa include June 29/30; July 13/14; August 10/11, and more! 

Wednesday, June 19, 2013

LEAF PLATTERS-SPAS FOR THE BIRDS!


Birds love to have water nearby in every season, but in the summertime, they seem to especially enjoy water for frequent drinking and refreshing splashes.  A leaf platter water basin is ideal for this purpose because the water is shallow and the decorative leaves attached to the side made the perfect sundeck for the birds to preen and relax.  In our Hypertufa Studio you learn to make your own leaf platter. This is a creative, fresh twist on typical bird baths and a point of interest in your garden that's far and above typical bird bath projects.


You begin with a stroll through the gardens to collect the leaves you'll use in your casting. My favorite leaves for this project are hydrangea leaves because they can be found in multiple sizes are tough and have deep veining on the back.
We cast individual leaves on smaller mounds of sand to use as the ornaments for the leaf platter.


The leaves are arranged face-side down on a mound of damp sand.  This hump of sand makes the bowl shape to hold the water in the finish water basin.  The leaves can be arranged in an accidental or an ordered fashion.  Once the mound of sand is covered with leave and thin layer of concrete is pressed onto them to hold them down and capture a perfect impression of their shape and veins in the concrete. 


To finish the platter, a thick layer of hypertufa is patted onto the layer of concrete to add support  and shape the outside of the plater.  The "sandwich of the concrete and the hypertufa make a perfect combination.  The concrete captures the leaf  detail and allows the basin to hold water. The hypertufa adds shape and heft without the weight.
Usually basin bottoms are left plain but here old rosette irons were used to stamp a design in ot the bottom and wine corks were inserted as feet.Lyn used huge hosta leaves forger large elegant basin.

Caroline and Chris had us make this custom super large leaf basin.  It makes a stunning water feature with or without  a fountain and pump!Don't miss the chance to make your own leaf platter this summer.  

Join us in one of our Hypertufa Studios at From the Summer's Garden 
Get sign-up info here! This is a great way to reconnect with old friends or enjoy your own personal "staycation." 


Wednesday, June 5, 2013

NOW HIRING STUDIO ASSISTANT APPRENTICES

Know any hard-working creative kids in either 8th grade or freshmen in high school?  At the end of the summer two of our graduating senior design studio assistants will be leaving us for new adventures.  I am looking for two new students who have some art background, are willing to learn a variety of new skills and techniques and have a strong work ethic.
If you think you or someone you know might be interested in this opportunity, share this news with them.  Interested students should read this job description and then they should,  NOT THEIR PARENTS, email Steve at summersgarden@everestkc.net.


   It's hard work but it is so much more than just a job!