
Five Fun Container Finishes for Fall
By Steve Hess

It’s fun to create flashy colorful finishes on planting containers and they certainly stand out as a definite focal point when needed. But most of the time its nice to let what is planted in the container be the star and let the container offer a neutral support of the knockout container planting. Here are five “neutral-ish finishes you can easily apply to terra cotta or hypertufa containers that will preserve their porosity and breathability.


1. Mud Bath
Look around your yard and garden for the darkest dirt can find. Scoop a shovelful or two into a large bowl and add water to make a paintable mud. Coat the dry container with a thick layer of the wet mud and leave on the container for at least two weeks. Place the container in the hot sunshine and allow it to bake. Don’t waste water to clean off the container. Just plant it up and the rain and will slowly wash away the mud and reveal the nice warm natural stained surface.

2. White Wash
Spray the container inside and out with water. Dip a two-inch brush into exterior white latex paint allowing it to enter the paint only ¼ “- ½ “. This will prevent you from using too much paint at once. Apply the paint with a light touch using crisscross or cross-hatch strokes. This will keep the paint from getting into the darker areas. Allow the container to dry in the sun

3. Green Rub
Put on a pair of mud gloves those orange gloves with rubber fingers) and dip your gloved hand directly into exterior latex moss -colored paint. Just dip the fingers of the glove into the paint. Run your gloved hands over the surface of the container, allowing paint to rub off onto the container. Apply a heavier amount of paint at the top and create a gradation, gradually reducing the amount of paint until you reach the bottom with no paint at all. As the paint dries, swipe a moist cloth over the surface to pull off paint from raised textured areas. You can try two colors of paint as well.
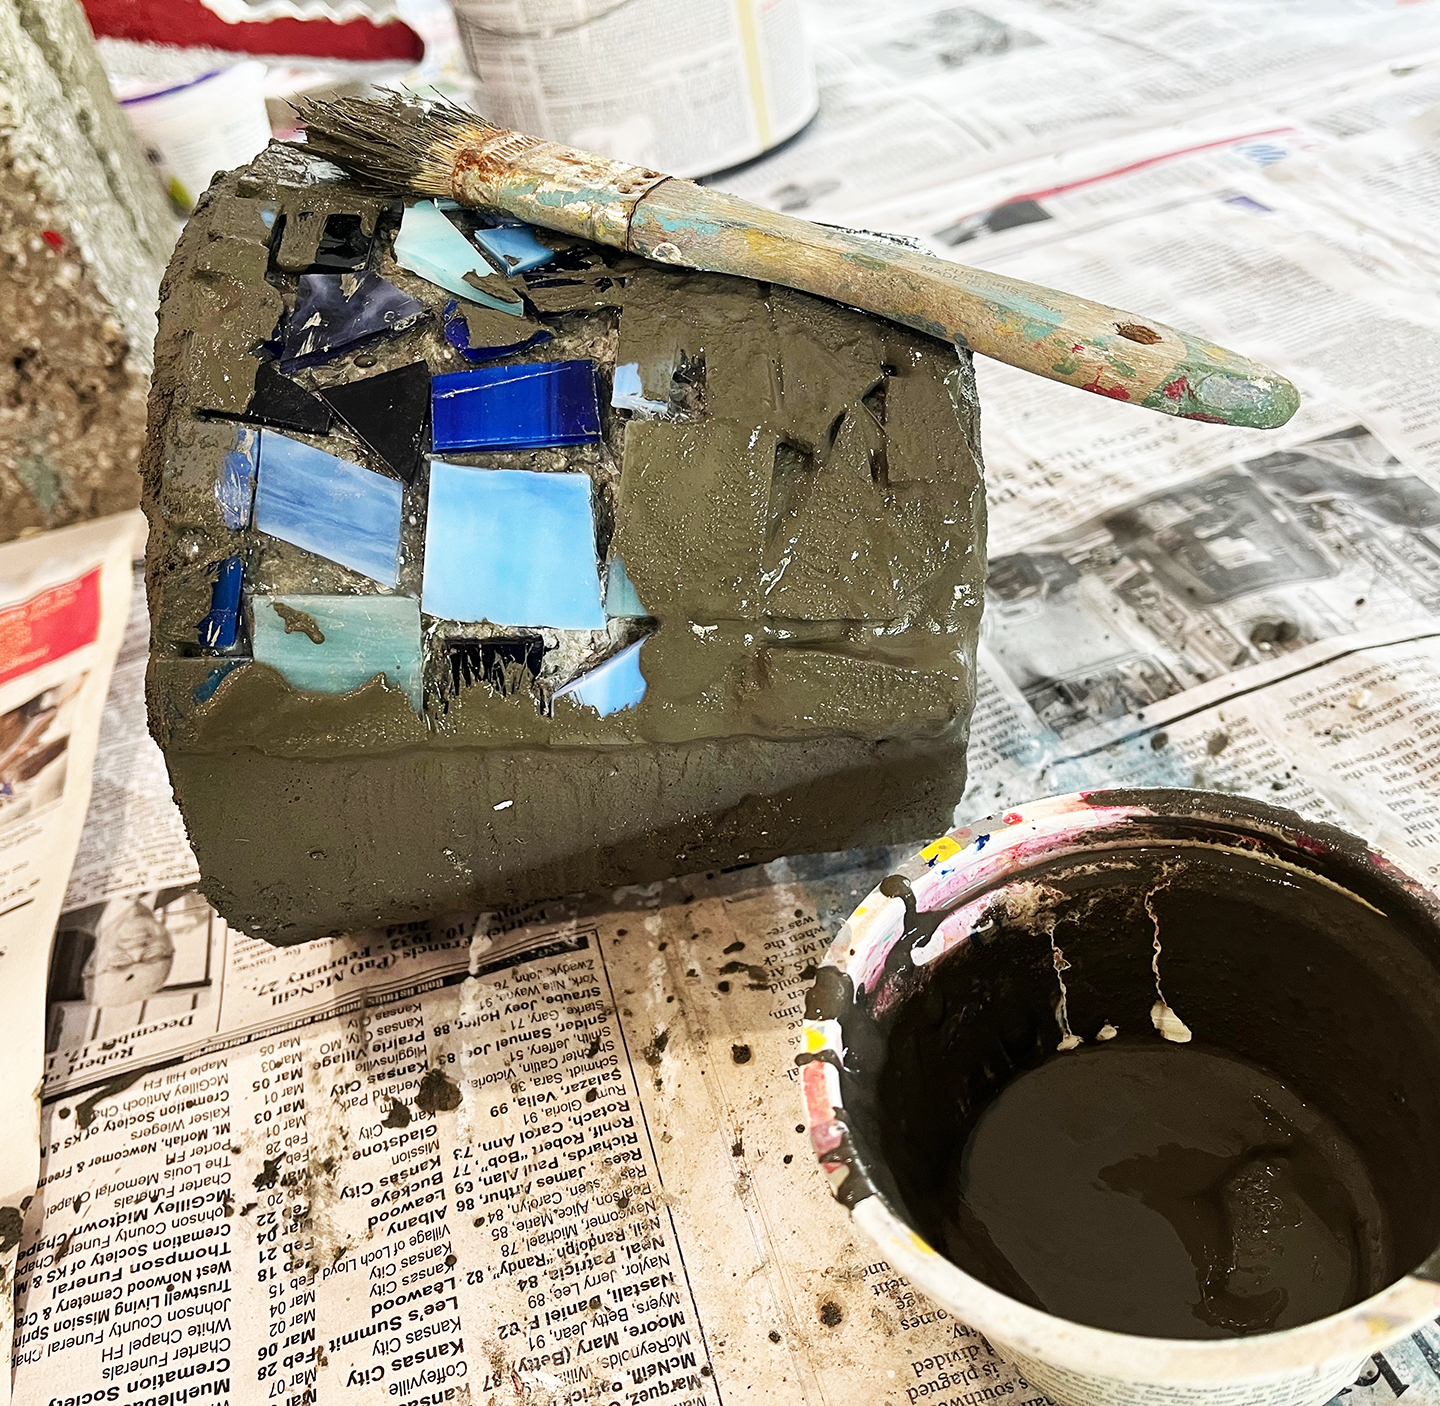
4. Mosaic Accent
This mosaic feature works best on a container with a smooth surface. Decide which
area on the containers you like to accent with a focus of mosaic work. Use urethane
glue, (E 6000 or Goop) to glue on colored tiles, stones or glass peices. Allow to dry
overnight and grout using sanded grout close to the color of your container.

5. Powder Coat
In a small plastic bowl mix together 2 cups fine sand and 1 cup of Portland cement. Then in another bowl, mix 1 cup of white glue with 1 cup Portland cement and enough water to make a creamy paintable mixture. Lay your container on its side, doing one side one at a time. Coat the entire surface with the glue/cement mixture. Immediately
Sprinkle the sand cement mixture over the wet surface using a mesh strainer, again, less is more. When all four sides have been coated, place the container upright and do the top edges going down into the inside about 3-4 inches. Allow to dry in the hot sun.


