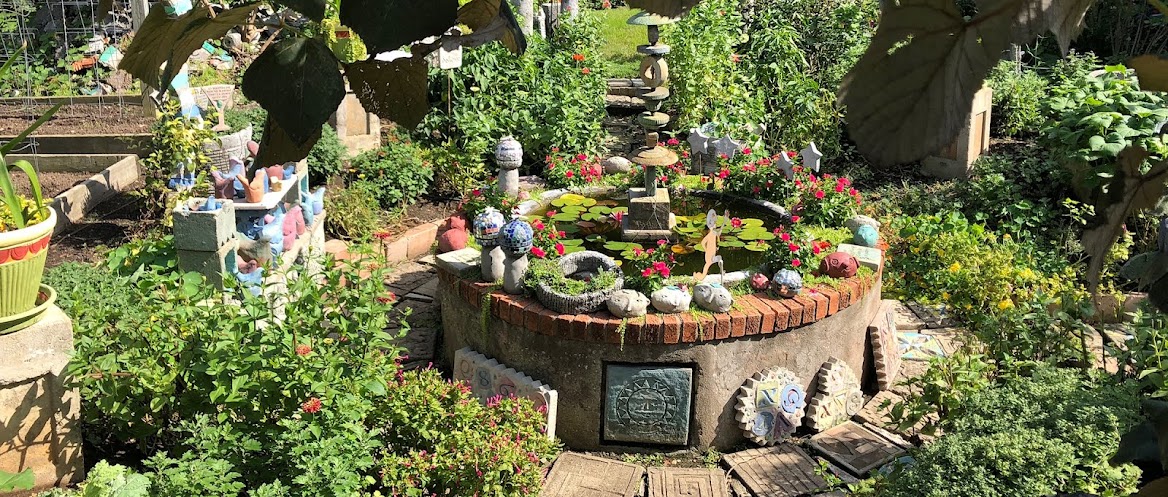
Hypertufa Garden Cairn
A cairn is a human-made
pile or stack of stones. The word cairn comes from the Scottish Gaelic càrn, (caren) It
is pronounced the same a Cairn terrier, the “Toto” type of dog.
Cairns have been used for a broad
variety of purposes, from prehistoric times to the present. They have been built and used as burial monuments,
for ceremonial purposes, to locate buried items, such as caches of food or
objects; and to mark trails. They vary in size from small stone markers to
entire artificial hills, and in complexity from loose conical rock piles to
delicately balanced sculptures of carefully selected and positioned stones.
In this project, you will make a
decorative garden sculpture held together by a rebar stake rather than by
painstaking balancing of loose stones.
You will also sculpt your stones from lightweight hypertufa resulting in
the shapes you want to fit your garden.
What You Need:
Four-foot length of ½” rebar or
longer if you want a taller stake
TIP: You can buy rebar precut in
four foot lengths and in ten-foot lengths.
Four feet was perfect for me. For taller stakes you can cut a 10 foot
length of rebar down to size. Keep in
mind that your stake needs to be firmly set in the ground at least a foot to
hold the weight of the sculpture.
Equal length
of 5/8” PVC pipe
(This pipe
should slip right over the ½” rebar}
Sharpie or
other marker
Hack saw for
cutting rebar and PVC pipe
Heavy
plastic sheeting to cover your work surface
Plastic
mixing bowl or pail
Freshly
mixed hypertufa. I use this recipe:
http://fromthesummersgarden.blogspot.com/p/normal-0-false-false-false-en-us-ja-x_10.html
TIP: You can skip the mixing of the hypertufa and
use sand topping mix to sculpt your shapes.
The resulting “stones” will be extremely heavy- remember, you will be piling
them on top of each other.
Mud gloves
Concrete
trowel
Dry all-purpose
sand
Brick
What You Do:
1. Go online and spend some time looking through
examples of real stone cairns to familiarize yourself with their shapes and construction.
It will inspire you and lead you to a better design result. Make note of the different shapes of the
stones, the smoothness of their surfaces and how they interact with one
another. Then draw shapes you like on a
piece of paper, some simple and others less usual. It will be a combination of simple and
different that makes your sculpture successful.
Select 5-7 of the shapes you like best and arrange them one on top of
another. The larger heavier shapes
should stay closer to the bottom while the smaller and lighter shapes will be
best positioned near or at the top of your cairn. The taller you wish your
rebar stake, the more shapes you will need to populate it, just remember to end
up with an odd number of pieces. Once
you have designed the shapes you like, draw each of them a few more times to
familiarize yourself with their contours and characteristics.
This exercise will fuel
your brain so when you begin the sculpting phase you can proceed with confident
efficiency.
3. Use the
marker to measure out the thickness of each stone of your cairn design along
the length of pvc pipe. One length of
pvc pipe will pass through the center of each stone.
When dried and cured, this encased pipe will make it a
simple task to build your cairn by sliding each stone onto the rebar stake.
4. Put on your mud gloves and mix up the
hypertufa. With your drawing in front of
you, shape each of your stones around a vertical length of pvc pipe ensuring
the entire pipe is covered with the hypertufa and the bottom and top openings
are free of blockage. Sprinkle each
stone with the dry sand for an interesting natural texture.
6. Smooth each stone using a brick and your
concrete trowel. Work off rough spots
and soften the edge where the stone rested on the plastic so the stones lose
some of the flatness on the back side and appear more three dimensional.
7. Select the location in the garden to site
your cairn and push the rebar stake as deep as you can into the ground.
TIP:
Watering the site with a hose or watering can makes the job easier. The rebar needs to go into the ground at
least a foot to support the cairn adequately.
If you can reach the top, wack it a few times with a hammer.
8. Assemble your cairn by sliding each stone on to
the rebar stake through the embedded pvc pipe. Adjust to get the look that
makes you happy. It will make a great
support for that new clematis you wanted to add to your garden!
IF YOU'D LIKE TO MAKE YOUR OWN CAIRN BUT WITH SOME HELP, JOIN US IN OUR CAIRN CREATIVE WORKSHOP!
MORE INFO: peaceinmygarden.com


