Friday, July 29, 2016

A GOOD TIME FOR BLACKBERRY PEACH LIME PIE

Wild blackberries are ripening in the meadows up at the Abbey.  They are large and juicy this year because of all the rain.  These berries are very tasty but deadly because they have thorns that won't stop.  The thornless version in our garden have peaked and we'll pick for about 1 more week.  Here's a tasty pie that combines a fresh lime with locally grown peaches and blackberries. My, my my...I love pie!
Blackberry Peach Pie with Lime
Make your favorite two-crust piecrust recipe and chill.
Wash, pit and chop 6 ripe peaches.
Remove the ends of 1 lime and chop the entire thing.
The lime adds huge flavor, is full of natural pectin to help thicken the pie filling and keeps the peaches from browning.
Add 2 cups fresh blackberries
Mix in:
2 TBS tapioca
3 TBS cornstarch
pinch of salt
1 1/2 cups of sugar

Mix together and allow to sit while you prepare the crust.
Fill the pie shell with the fruit mixture and dot with butter.  Add the
top, brush with cream and sprinkle with cinnamon and sugar.
Bake at 400 degrees for 10 minutes and then another 55 minutes at 350 degrees.  This one tends to be a dribbler so put the
catch-pan underneath the pie to contain the mess....but oh, is it worth it!
Tuesday, July 26, 2016

CREATIVE WORKSHOP ON AUGUST 4

Creative Workshop on August 4
Thursday evening 7:00-9:00  
$30 per session...2 hours and you're done!
Pick any item on the workshop menu and get ready for some creative fun.
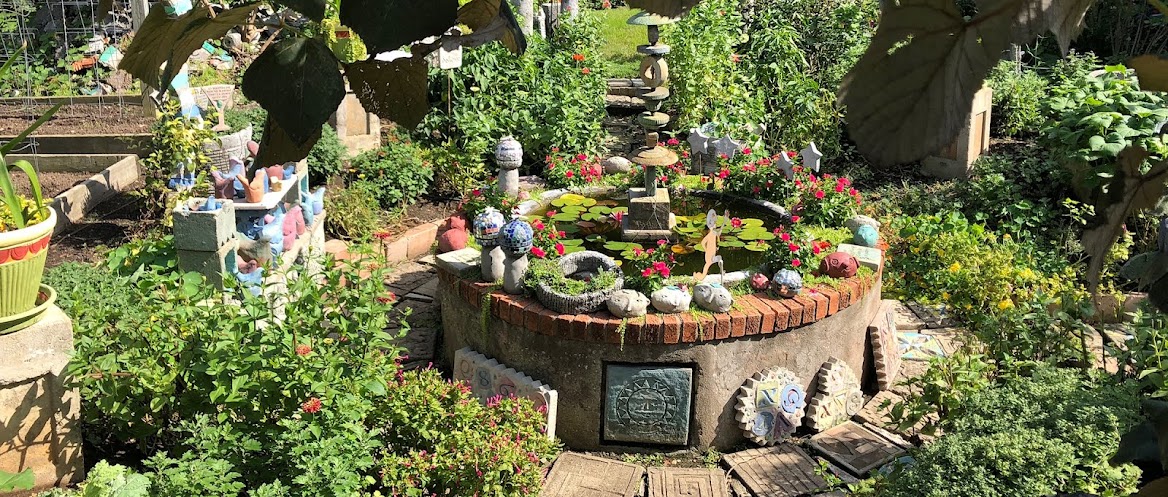
Make your own fountain sculpture
Stencilled stepping stones
Cast leaf or sun mosaic water basin
Mosaic sun garden stake
Collage stepping stone
Mosaic stepping stone
Concrete garland sculpture
Hanging beaded cone planter
Hypertufa planting container
Sectional sun stone
Join us! Click SIGN-UP BUTTON above
or visit:www.peaceinmygarden.com

Monday, July 25, 2016

JULY HYPERTUFA STUDIO

Our July Hypertufa Studio kept participants hopping.  Each person made 5 completed projects during the the two-day,  9-12 o'clock sessions.
 The garden is bursting with all sorts of nicely veined leaves for leaf casting.
 Here a bird water basin has been formed over a hump mold of sand.
 Patti is using a concrete mixture that approximates clay for fine detail sculpting.
David went a step further and made his garden gnome into a gargoyle with large pointy ears.
Hand sculpted stepping stones and two types of planting containers were also created by each participant in this studio.   That's a lot of cool projects in just one studio!    
Join us for our final Hypertufa Studio of the year, Saturday and Sunday mornings, September 10/11 , 9-12 o'clock.  
Visit: peaceinmygarden to enroll.

Wednesday, July 13, 2016

SUMMER HERB TEA


Make Your Own Refreshing Herbal Iced Tea 
Many gardeners grow a variety of herbs for cooking that can also be used to create a refreshing summertime iced tea. Any of the mints are easy choices to make herbal tea but lemon balm, monad/bee balm, anise hyssop,  and strawberry and raspberry leaves can be blended to make delicious referring herbal teas.


What You'll Need:
Selection of fragrant herbs including peppermint, spearmint, anise hyssop, lemon balm, strawberry leaves, etc.

16 green tea teabags
Stainless steel stock pot
2 gallons (32 cups)  of water
sweetner of your choice: Splenda, honey, sugar, etc.
Citrus fruits for garnish: lime, lemon and or orange
fresh ice
These volumes can be easily reduced.

What You Do:
1. Fill the stockpot with 2 gallons of fresh water and bring to a rolling boil.

2. While you wait for the water to come to a boil, unwrap the green tea bags from their paper envelopes.

3. Collect fresh herbs and bunch them into a bundle with a clean rubber band. About 10-15 herb stems should work nicely.

4. Remove the boiling water from the stove and drop in the tea bags and the
bundled herbs. Allow to steep over night.

5. Strain the tea through a sieve and put the tea bags and bundle of spent herbs on the compost pile.  Don't forget to remove the rubber band!

6. Leave the tea plain or sweeten with your favorite sweeter.

Fill large tumblers with ice, and your tea.  Garnish with citrus slices, an herb sprig and down it goes.   Cheers!

AMAZING PAPER


This coleus with purple veining is great research for a surface design on a newly cast piece of paper. A ketchup squeeze bottle can be filled with purple pulp which allows you to draw in wet pulp onto the surface of the wet white or green paper. When the finished product is couched on a felt and flattened in a paper press, it will make for a pretty cool piece of paper! Paper is so amazing.


Tuesday, July 12, 2016

MAKE A SECTIONAL SUN STONE


Sectional Sun Herb Stones
Here’s a project that will add a nice feature to your garden. You make one mold and cast four duplicate pieces from concrete to create a full sun. After placing in your garden, plant the center with thyme or other low-growing trailers.
Complete instructions follow but you can make this sectional stone in our next CREATIVE WORKSHOP session on Thursday evening, July 21 from 7 - 9 pm, or choose from a cool menu of projects that you'll take home after the two-hour session.
 Visit: www.peaceinmygarden.com to enroll.
Here's how you can make this Sun Sectional stone on your own.
What you need:
1 ½” insulation foam available from your favorite home improvement store
marker
keyhole saw
2 ½” common nails
vegetable oil and paint brush
latex paint
1 bag Quikcrete sand topping mix
plastic bucket
trowel or scoop
What you do:
1. Draw a simple sun shape starting with a circle for the center. Add rays and fold the drawing into quarters. You can make this any size you wish. I used an 8” square for mine. This quarter section of your drawing is your pattern for your stone.
2. Cut out 2 identical squares 2 inches larger than your finished stone size. Use the keyhole saw to cut the foam. Cut out your quarter pattern , center it on one of the foam squares and trace with the marker.
3. Cut out the center of the quarter sun from the foam. This first piece will be the top and sides of your mold.
4. Position the cut mold top directly on top of the second piece of foam. Trace the shape of the mold onto the base piece using the marker. 
5. You can leave the surface of the stone plain and simple or you can add decorative detail by carving into the base piece of foam using an X-acto knife.
6. Since you will be using the mold at least four times, it is a good idea to paint all sides with latex paint. This will strengthen the foam and make it easier to release the cast stones.

7. To prepare the mold for casting, position the top of the mold directly over the base and pin the two pieces together using the 2 ½” nails.
8. Brush on a thin layer of vegetable oil on insides and bottom of the mold. 
9. Measure 4 cups of sand topping mix into plastic bucket. Add water slowly and mix to consistency of thick frosting.
10. Use the trowl or scoop to fill the mold, tapping and pressing the concrete into all areas of the mold. Gently tap the mold to remove air bubbles and to level the mix. Fill to the top edge of the mold.
11. Allow to set and cure for 24 hours.
12. Use the trowel to pry out the nails holding the mold together and remove the bottom piece of the mold. Then gently press out the cast piece and clean sides of your cast by gently rubbing with the trowel. 
13. Repeat this process three more times resulting in four stones segments that will
be put together to form a complete sun design. If your mold should break when you are removing cast pieces, no problem. Simply fit them together as a puzzle and secure onto the mold base with more nails.
14. Allow cast pieces to fully dry. You can leave the pieces plain or ad color using flat exterior latex paint.